Drawing Faces
. . . the Challenge of Perspective
Once you rise to the artistic challenge of drawing faces, the personal rewards can be limitless. Most important is that your subject looks real and looks alive.
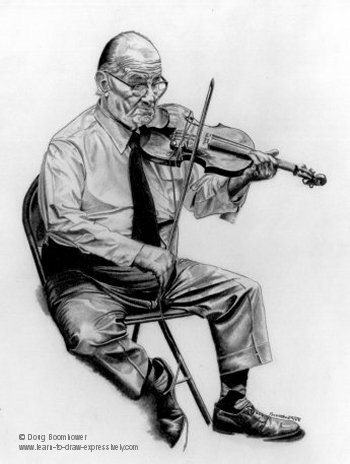
To draw people convincingly, also requires close observation of the figure's clothing. When drawn properly, the folds and the wrinkles will actually reveal the contours of the body underneath that clothing. This is a very powerful drawing technique.
When drawing the body, you therefore have to capture the natural gesture of the figure. Otherwise your figures can look like stick men. (In contrast, here is some discussion on the nude figure.)

This is my original composition of Billie Holiday. For further details on this drawing, see drawing clothes.
Now Back To Drawing Faces
The human face has a general set of proportions. Probably the most difficult aspect of drawing people is to capture the slight variations in that set of proportions, in order to capture each person’s individual likeness.
Following are the preliminary face sketches which were stepping stones to the final drawing.
Image #1 below shows the proportions of a face. However, these proportions are only applicable if you are looking "straight-on" at the face.
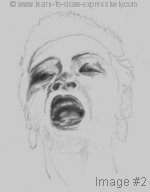
Image #2 is one of my preliminary face sketches of Billie Holiday. Her head is tilted back. This change in position will alter the proportions.
To demonstrate this change in proportions, I’ve drawn a line through the base of her nose in Image #3. Because the head is tilted back, the distance between the nose and the chin is elongated, while the distance from the nose upward is shortened. (This is called foreshortening or perspective).
Granted, her mouth is open, which elongates the lower distance even more so. However, if the mouth were closed, the distance from the nose to the chin would still be elongated from the general proportions seen in #1.

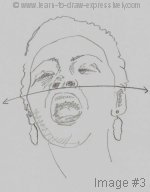
Compare Image #3 and Image #1. The distance from nose to chin is longer in #3 than in #1. This is because the head in Image #3 is tilted backwards.
Drawing Faces and Perspective
When a head is tilted backwards, the chin is closer to you, while the forehead is further away. Perspective makes objects closer to you appear larger, while objects which are further away from you appear smaller.
Look at the simplified examples below to see how perspective (also called Foreshortening) can change facial proportions.
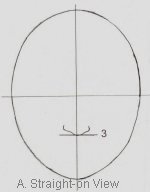
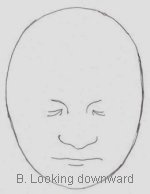
Look at the distance between the nose and the chin in all three drawings. Note that when the face is looking downward (B), the lower part of the face becomes narrow because it is receding away from you. The forehead is larger because it is closer to you.
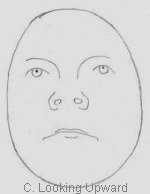
When looking upward (C), the chin appears bigger because it is closer to you. The forehead appears smaller because it is further away from you.
Regardless of the fact that the human head changes positions,
when learning how to draw faces, always come back
to that basic "straight-on" set of proportions
so that you have a reference point to work from.
Learning to deal with foreshortening involves not only the face, but the entire figure, which you can see on this page about foreshortening. It is a crucial element in making your drawings look realistic.
Drawing faces is often implied to be more complicated than it really is. As with anything, practice will teach you to be comfortable with facial proportions. If you need someone to practice on, why not draw your self-portrait by looking at yourself in the mirror.
Once again, keep it simple. Learn to draw what you see.
Your eye will guide you.

Here are some pencil preliminary facial studies I did to arrive at the final charcoal drawing above.
- I establish the basic outline of the face.
- My emphasis is not to create a photographic duplication of the face, but rather it is an emotional response to the face. In other words, I am not drawing every tooth in her mouth.
Think about it. When you look at someone smile at you,
you see the smile, but you don’t count every tooth.
Remember this when you are drawing faces.
What you want to communicate to the viewer is the essence of the person. Therefore, when drawing faces, sometimes details are included. Sometimes details are omitted. Sometimes subtle details are accentuated - whatever serves the drawing best . . . whatever elicits the strongest emotion.
Here I'm starting to fill in the image using lights and darks.
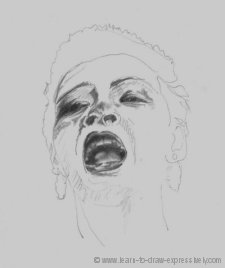
In this face sketch, the study in lights and darks is becoming more concentrated. Note how realistic the mouth is beginning to look.
Lips, teeth and tongue work in harmony, yet the viewer is not constricted by details. Ironically, the viewer sees details that are not there.
Drawing faces like this depends on close observation. You have to learn what to put in and what to leave out. Notice how real the tongue looks . . . yet it is only simply suggested.
Note the cross-hatched area below the mouth to define the chin. (See more on cross-hatching here.) I’ve also introduced some earrings, and discuss their importance below.
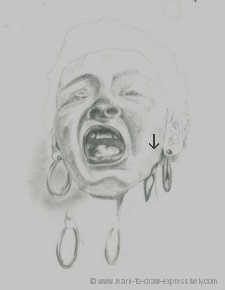
Another preliminary drawing. I’ve used the same technique regarding lights and darks. I just refined things more. I’ve softened the nose, and I have defined the cheeks and the chin with lights and darks (not with lines).
I’ve decided to add the earrings for two reasons.
- To introduce contrasts and to add dramatic interest.
- The arrow indicates where I have imposed a shadow cast from the earring. By following the contours of her face and neck, this shadow gives three-dimensional definition to this area of her face.
Also note the various preliminary drawings I did of earrings.
Detailed Step-by-Step Instruction
With practice you can learn to draw lifelike portraits in pencil. You can also learn to do expressive charcoal drawn portraits.
Click here for commentary on a step-by-step drawing from life.
If you don't have a model, a great practice is simply to look in the mirror. You can learn to draw eyes , noses and mouths by doing self-portraits. The same applies to your hands and feet. Throughout history, artists have used this method.
I have always believed that the best way to learn art is to sit and watch an artist at work. If you are interested in further exploring the detailed aspects of drawing faces, check out my downloadable video e-book called How To Draw Self-Portraits.
To search my site, enter your search term in the box below, and click on the Search button. (Google ads may appear at the top of the results page ... your search results will be just below.)
Return from Drawing Faces to Learn To Draw Expressively Home Page


