Drawing Clothing Textures
... even a shirt can look exciting
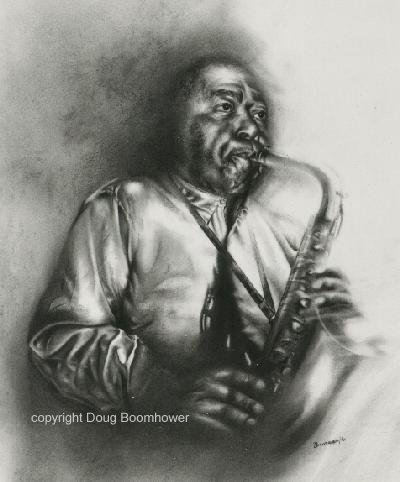
This portrait is a detailed study in texture.
Since we are discussing drawing clothing, let’s look at the shirt.
For this drawing, I took a white shirt of my own and draped it over a chair in my studio. I raised one shirtsleeve, to give me the impression of a bent elbow. Then I darkened my studio and shone a low light on the shirt to reveal shadows and folds in the fabric.
Using this shirt as my model, I created what you see in the portrait. I had to improvise so that it would look like there was a body underneath the shirt. My experience with drawing figures helped me here.
In order to see, since I had darkened the studio, I clamped a light directly over the area where I was drawing.

#1: Note this important highlight that I put on the shoulder. I did it with a kneaded eraser. (This eraser is an invaluable tool for pulling charcoal off of paper.)
Although this shoulder area is small, I want to emphasize the importance of a well-placed highlight. This highlight becomes an integral part of the shirt. It emphasizes the underlying bulk of the figure as well as creating interest by drawing the eye to that area.
#2: Indicates where the arm bends. Any pull on the clothing will result in folds. If you bend your leg, there is a pull at the knee; if you bend your arm there’s a pull at the elbow. That pull results in folds which radiate outward.
#3: The folds in the shirt become less intense as you move away from the elbow, however the entire shirt gets my full attention. Even though this upper sleeve area is less intense than the area around the elbow, there are a wide variety of subtle details here that create interest.
#4: Sparse detail in this area creates a nice contrast, and it implies the “white” of the shirt.
Drawing Clothing - The Logic of Folds
When drawing folds in clothing, it is very important that there is a logical sense to everything you do. Each fold has a beginning and an end.
The pattern of dramatic folds at the elbow make logical sense. In fact, the entire shirt is like a "road map" of folds and shadows that imply the bulk of the figure underneath. Watch this video for more on drawing folds.
This logic is what makes the shirt look so real, and it is this reality which has such a strong effect on the viewer.
The majority of the shirt was done using a 3B Ritmo charcoal pencil. I would lay the charcoal down and use watercolor brushes to blend it into the paper. For very dark areas, I would use my fingers in order to make the charcoal adhere to the paper.
Never Let Your Guard Down
Notice the attention paid to the entire shirt, not just the elbow area. Even small creases in the shirt are created with a kneaded eraser.
For very light textures, I used vine charcoal or "unloaded" brushes (that is, don't add charcoal, but use the brushes just as they are. Used brushes will have enough charcoal in them to get the result you want.)
My rule of thumb always is: "Never let your guard down." By that I mean, leave no piece of the shirt unattended to.
I created this drawing of Duke Ellington, using my own white shirt.

Notice the close observation of texture I use when drawing clothing.
Return from Drawing Clothing to Drawing Realistic Texture
Return from Drawing Clothing to Home Page


