Who Knew Metal Textures
. . . could be so much fun to draw
The majority of my drawings present a unique artistic challenge. Metal textures was the challenge in this case. How was I going to capture the metallic texture of an old weathered barrel?

This is a drawing of a man plucking a "washtub" bass. A washtub bass was an early precursor to the stand-up bass. It consisted of a pole, a rope, and a barrel. The barrel acted as an amplifier. When the rope was plucked, its vibrations resonated in the barrel.
Texture of the Barrel
Note how real this rusty old barrel looks. I've approached the surface of the paper in a variety of ways in order to achieve this appearance.
On the side of the barrel, you see everything from tar residue to dents in the metal. When natural light falls across old dented material like this, you get a variety of highlights. I've created those highlights with a kneaded eraser.

Arrow #1: The tar residue on the barrel is implied by the darker areas, which I drew with an HB charcoal pencil). I always use a hard lead for clearly defined areas.
Arrow #2: I utilized the tooth of the paper to accentuate the roughness of the old metal. The tooth of the paper will pick up more or less of the charcoal depending on how lightly you drag your pencil across the paper. Experiment on your own to see what works for you.
The top of the barrel is not as rough as the sides. I have softened it with brushes. Notice the variety of lights and darks across the whole top surface. Many of the dented areas have been created by actually tapping blending stumps on the paper. (I've mentioned in my texture introduction that you should try to think "tactile"...how much more tactile can you get than actually tapping the paper?)
Arrow #3: Note the detail where the rope is fastened to the center of the barrel. You can see where the tension of the rope has pulled up pieces of metal.
And finally, in this same area, note the shadow cast by the rope. This adds depth, interest and realism to the metal textures.
The Power of Drawing Metal Textures
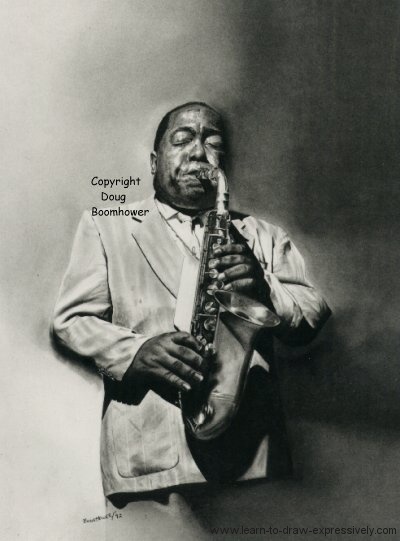
Attention to lighting is an important part of drawing textures.
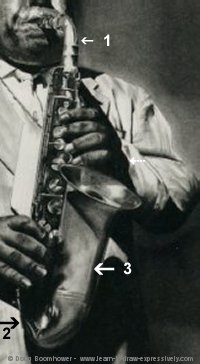
Note the three arrows pointing to the saxophone:
#1 and #2: Carefully placed highlights suggest the shiny, metal surface. The edges of these highlights are softened with brushes.
When I was planning this drawing, I decided that Arrow #1 would be the strongest highlight, so I put a piece of removable tape over this section. That tape remained there until the entire drawing was done.
The reason I do this is because while I am drawing, charcoal dust will permeate the paper to some degree. When I remove the tape however, I have a completely clean surface around which to work my strongest highlights.
#3: I pay close attention to subtle variations. First I lightly apply charcoal with 3B pencils, and then I soften different areas with brushes and put subtle intermittent highlights in with a kneaded eraser. Once that is done, I actually tap a couple of areas with an HB or 2B charcoal pencil. The result is a very realistic surface.
Here is another example of using charcoal to imply metal texture.
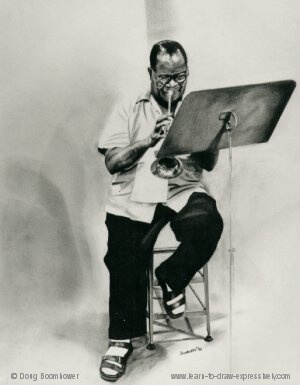
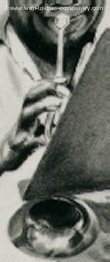
Note the complex and random pattern of varying tones on the bell of the trumpet. These tones suggest three things: round, shiny, metal.
Return from Metal Textures to Drawing Realistic Textures
Return to Home Page


